For safe use of multifunction printers
Introduction
With the development of the information society, we are surrounded by various threats such as computer viruses, leakage of personal information, and unauthorized access from the outside. Against diversifying threats, efforts for security measures are one of the most important issues for customers. These security threats are not limited to personal computers, servers, and networks. You can reduce such security threats by regarding a multifunction printers as one of the IT devices and setting and operating it appropriately.
Ricoh updates software/firmware and provides security patches to fix vulnerabilities detected in its products such as multifunction printers and printers. In order to use the multifunction printers and printers more safely, please use the latest software/firmware of the products.
Items to be supported by customer's environment
- By placing your information devices, including multifunction printers and printers, in a network isolated by a firewall, you can prevent unauthorized access from the Internet.
-
PC operation
-
Locking PC when leaving your seat
We recommend you lock your PC when you leave your seat with a browser open on your PC. -
Separating browser usage (Do not view unrelated websites with the same browser while you are logged in to the web.)
If you are logged in to the web from your PC browser and browse other unrelated websites, we recommend you use a different browser, except when you view trusted websites. If you use the same browser, we recommend you log out before browsing other websites. You need to log out before browsing other websites instead of just closing the logged-in windows and tabs. - Precautions on hyperlinks (Open only trusted links) We recommend you be careful when opening hyperlinks in emails and bulletin boards on your PC, and open only trusted links.
-
Locking PC when leaving your seat
Items to be supported by customer's environment*1
-
Operate machines with private IP address.
Unauthorized access from the Internet can be prevented by operating machines in a local area network environment such as an inhouse LAN. - By changing the administrator password/supervisor password of machine, you can prevent the attacks (setting changes) by a malicious third party from the Internet. Be sure to change the password from the default value.
-
We recommend you protect the data stored on multifunction printers by using the user authentication or the password for documents stored in document server settings.
- By performing user authentication such as the user identification or authentication (IC card or password input), only authorized users can use multifunction printers.
- By setting the password for documents stored in document server, any third party cannot use the machines by setting a password for accessing the documents stored in document server.
-
SMB settings*2
We recommend you use the v3.0 or higher SMB.
For older models that do not allow such settings, we recommend you protect with IPsec. -
Storage encryption
We recommend you encrypt the HDD. -
Access privilege setting
We recommend you limit the permissions to cancel a job to the job owner and the administrator.
Items to be set in the Web browser (Web Image Monitor)*1
-
Access limitation by IP address
We recommend you limit the range of IP addresses of PCs that can use MFPs/printers as much as possible. You can prevent unauthorized access from the Internet. -
Closing unused communication port*3*4
We recommend you close unused network ports.
In particular, rsh, telnet, ftp, lpr, etc. do not have encryption function by themselves, so if you are concerned about network eavesdropping, we recommend you close the unused ports or protect them with IPsec described later.
For the applications that may be affected by closing the port, see the relevant pages of the instruction manual for each product on the Ricoh Web page, and check them
at " Top Page>Security>Access Control ".
If you have any questions, please contact the Ricoh's call center. -
SSL/TLS settings
-
Installation of device certificate
To prevent information leakage via the network, we recommend you use encrypted communication for the models that support encrypted communication.
Encrypted communication includes SSL/TLS and IPsec. See the instruction manual for supported communications.
We recommend you use a certificate issued by a trusted third-party certificate authority instead of a self-signed certificate as the digital certificate to be used to encrypt the communication.
If you want to use a self-signed certificate, you need to install it on a PC that uses a browser.
We also recommend you create a certificate with a key length of 2048 bits or more. -
Limitations for using SSL2.0/3.0 and TLS1.0/1.1*5*6
We recommend you do not use the older standard SSL2.0/SSL3.0/TLS1.0/TLS1.1.
For older models that do not allow such settings, we recommend you protect with IPsec. -
Limitation of cipher suites*5
We recommend you do not use RC4/DES/3DES with lower cipher strength.
-
Installation of device certificate
-
IPsec settings
If you need to use a communication method without encryption function although you are concerned about network eavesdropping, we recommend you protect communication with IPsec. -
SNMP settings
To reduce the risk of network load attacks using SNMP, we recommend you take the following measures, involving the products from other manufacturers as well.
- Change the community name from the default name.
- Do not use the same community name, for example by changing it on the business establishment basis.
-
*1When you change the machine settings, it may affect the application in use, so check the settings and operation of the application before you change the settings.
-
*2If you use SMB3.0, you will not be able to use the Windows authentication.
-
*3Since PC FAX acquires the transmission result via FTP, you can no longer acquire the transmission result by closing the FTP port.
-
*4UnixFilter prints through lpr/lp/qprt, so if you close lpr/ lp /qprt, printing will no longer be performed.
-
*5The Job Deletion Tool of Enhanced Locked Print NX V2 will no longer be available.
-
*6RC Gate: Remote Communication Gate will no longer be available.
We also support various security functions, so please use them according to your environment. For details of the security functions, see the website below.
For safe use of multifunction printers
Items to be set in operation panel of machine
Operate with private IP address.
An IP address is a number assigned to a machine on the network. The IP address used to connect to the Internet is called the "global IP address", while the IP address assigned to a machine used in the local area network such as an inhouse LAN is called the "private IP address".
If a global IP address is set for a multifunction printers, it will be accessible to an unspecified number of users on the Internet, increasing the risk of information leakage due to unauthorized access from the outside. On the other hand, if a private IP address is set for a multifunction printers, it can only be accessed by users on the local area network such as an inhouse LAN. Basically, we recommend you set a private IP address for the IP address of a multifunction printers. For a private IP address, one in the following range is used.
[Private IP address range]
- 10.0.0.0 to 10.255.255.255
- 172.16.0.0 to 172.31.255.255
- 192.168.0.0 to 192.168.255.255

How to use the functions
-
*Please do not forget the login user name and login password for supervisor.
<For products which do not display password entry screen at startup>
Press [Settings] ![]() [Administrator Tools]
[Administrator Tools] ![]() [Administrator Authentication Management]
[Administrator Authentication Management] ![]() [Program/Change Administrator] on the operation panel and specify the setting
[Program/Change Administrator] on the operation panel and specify the setting
For details about administrator authentication, refer to the descriptions for "Security" in guide.
-
For customers setting password for the first time
-
*Refer to the default values for "Security" in guide.
-
-
For customers who are not sure if they set password or not, or forget the password
-
*Contact your service representative.
-
<For products which displays password entry screen at startup>
-
The screen prompting to change the password appears at startup. Then press [Change] for Supervisor to specify the password, and then specify the password for Administrator 1.
-
*At this point, login user name is default. (For default value, refer to the descriptions for "Security" in guide)
-
- After setting both passwords, press [OK].
- Turn on the main power again.
(For RICOH IM C6000/C5500/C4500/C3500/C3000/C2500/C2000)
(For more details, see the following link)


- Press [Administrator Authentication Management] and specify [On] for [Admin, Authentication].
- Log in with ID and password of the machine administrator.
- Press [Settings].
- Press [Administrator Tools].
- Press [Next].
-
Press [Program/Change Administrator].
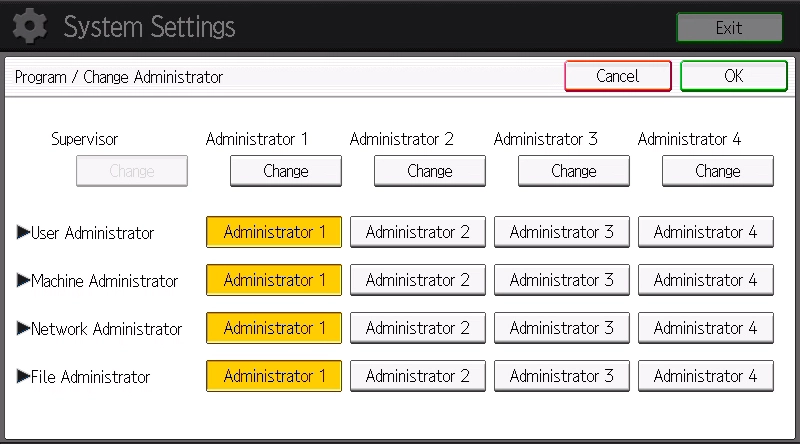
-
Press [Change] of the target administrator to set permission password.
At default, all permissions are assigned to [Administrator 1]. Select [Change] of [Administrator 1]. - Press [Change] under [Login Password].
- Enter login password and press [OK]. Make sure your login password is long enough, and complex so that it is less easily guessed by others. It is recommended to use a string of 13 or more letters consisting of uppercase and lowercase letters and numbers and symbols.
- Enter login password again to confirm, and then press [OK].
- Press [OK] twice. The machine is automatically logged out.
(For RICOH IM C6000/C5500/C4500/C3500/C3000/C2500/C2000)
(For more details, see the following link)
The flow of user authentication setting is as follows.
-
Setting Administrator Authentication.
(See "Introduction" and "Specify Administrator Authentication" for "Security" in guide.) -
Register and change the administrator.
(See "Changing Password for Administrator/Supervisor" in this document) -
There are 5 types of user authentication method: User code authentication, Basic authentication, Windows authentication, LDAP authentication, Integration Server Authentication. Select one of those authentication methods on the operation panel and specify necessary settings. Setting items vary depending on setting method. After setting Administrator Authentication, set User Authentication.
(For user authentication setting, refer to the descriptions for "Security" in guide.)
-
*Also user authentication can be performed by using IC card authentication system. For details, contact your service representative.
(For RICOH IM C6000/C5500/C4500/C3500/C3000/C2500/C2000)
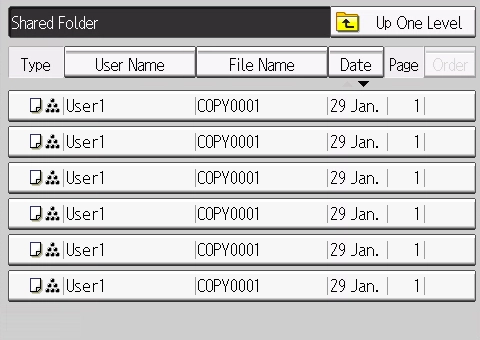
The document administrator or the document owner can specify the password
On the Home screen, press [Document Server]. ![]() select the desired folder
select the desired folder ![]() select the document to specify the password
select the document to specify the password ![]() press [Change File Info.] *.
press [Change File Info.] *.
-
*The procedure differs depending on model type.
You can use 4 - 8 digits numbers in the document password. For more details about preventing information leakage and specifying the password for documents stored in document server, refer to the descriptions for "Security" in guide.
(For RICOH IM C6000/C5500/C4500/C3500/C3000/C2500/C2000)
The document administrator or the document owner can specify the password

- Log in as the document administrator or the document owner from the operation panel.
- Press the [Home] key on the operation panel and then press [Document Server] icon on the Home screen. When the screen of "You do not have the privileges to use this function." appears, press [OK].
-
Select the folder you desired.
-
Select the document you desired.
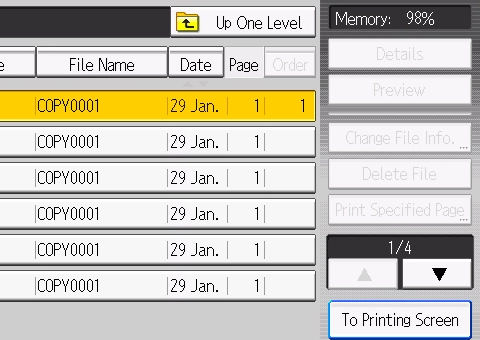
- Press [Change File Info.].
- Press [Change Password].
- Enter the password and press [OK]. You can use 4 - 8 digits numbers in the document password.
- Enter the password again to confirm, and then [OK]
- Press [OK].
Log out.
-
*You can also specify this setting by using Web Image Monitor of the PC
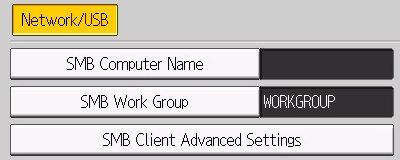
- Log in as the machine administrator on the control panel.
- Press [Settings] on the main machine screen.
-
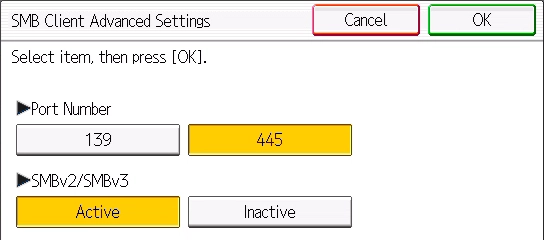
Press [Interface Settings] and then press [SMB Client Advanced Settings].
-
Press [Active] of SMBv2/SMBv3, and press [OK].
(For more details, see the following link)
- Log in as the machine administrator on the control panel.
- Press [Settings] on the main machine screen.
-
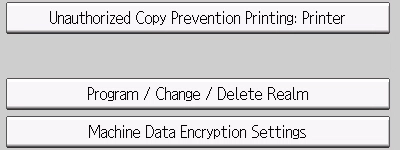
Press [Administrator Tools] and then press [Machine Data Encryption Settings].
-
Press [Encrypt].

-
Select desired data to encrypt.

-
Select the location to store the encryption key.

- Follow the direction displayed to store the encryption key to the desired location.
- Press [OK] to update the encryption key.
- Check the screen displayed and press [OK].
- Turn off the main power of the machine. When the main power is turned on again, the machine starts to convert the data on the memory.
(For more details, see the following link)
Select either of user authentication method: User code authentication, Basic authentication, Windows authentication, LDAP authentication, Integration server authentication beforehand.
-
*User code authentication/Integration server authentication may not available in some models.
- Log in as the machine administrator on the control panel.
- Press [Settings] on the main machine screen.
-
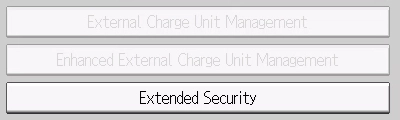
Press [Administrator Tools] and then press [Extended Security].
-
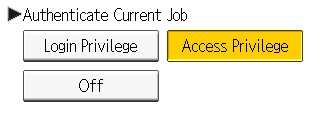
Press [OK] to display Authenticate Current Job. Press [Access Privilege] and then press [OK.]
Items to Specify in Web Image Monitor
(For RICOH IM C6000/C5500/C4500/C3500/C3000/C2500/C2000)
(For more details, see the following link)
You can specify the range of device's IP address that can access to the machine from the PC.
- Log in to the machine as the Network Administrator from Web Image Monitor of the PC.
-
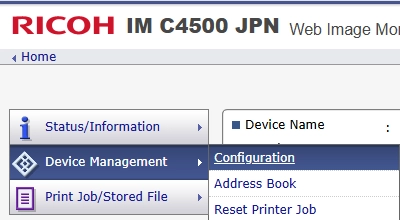
Click [Configuration] from the [Device Management] menu.
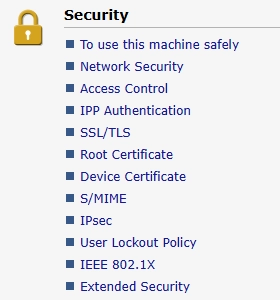
- Click [Access Control] in "Security".
- In "Access Control", click [Active] and specify the range of IP addresses that have access to the machine.
-
After completing the configuration, click [OK] and exit the Web browser.
-
*If the PC cannot connect to the machine due to wrong settings, disable the access control function on the operation panel and perform the procedure from step 1.
-
(For RICOH IM C6000/C5500/C4500/C3500/C3000/C2500/C2000)
(For more details, see the following link)
You can specify the range of device's IP address that can access to the machine from the PC.
- Log in to the machine as the Network Administrator from Web Image Monitor of the PC.
-
Click [Configuration] from the [Device Management] menu.
- Click [Network Security] in "Security".
- Specify protocols or port numbers to disable.
- After completing the configuration, click [OK] and exit the Web browser.
(For RICOH IM C6000/C5500/C4500/C3500/C3000/C2500/C2000)
(For more details, see the following link)
The flow of user authentication setting is as follows.
-
Installation of device certificate
You can install a device certificate from your PC via the Web.
- Log in to the machine as the Network Administrator from Web Image Monitor of the PC.
-
Click [Configuration] from the [Device Management] menu.
- Click [Device Certificate] in "Security".
-
Install Self-signed Certificate or Certificate Issued by a Certificate Authority on the [Site Certificate] screen.
-
*For detailed procedure, see the instruction manual for your device
-
-
When installing the certificate is completed, select the certificate for each application in "Certification".
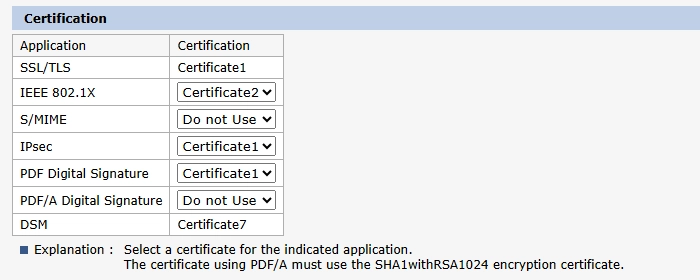
- After completing the configuration, click [OK] and exit the Web browser.
-
Encryption of Transmission Using SSL/TLS
You can specify encryption settings for network communication from your PC via the Web.
- Log in to the machine as the Network Administrator from Web Image Monitor of the PC.
-
Click [Configuration] from the [Device Management] menu.
- Click [SSL/TLS] in "Security".
-
Select the protocol to enable encrypted communication on "SSL/TLS" to specify the details about the communication method. It is recommended to not use SSL2.0 and SSL3.0, which are older standards.
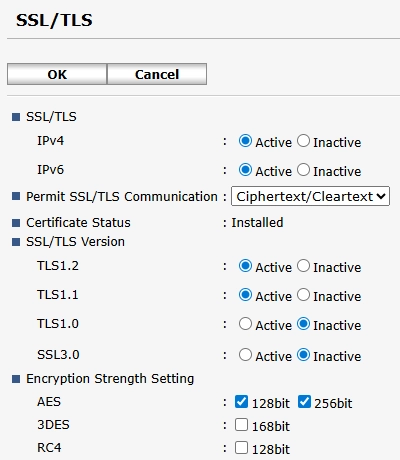
- After completing the configuration, click [OK] and exit the Web browser.
-
Limitation of cipher suites
You can specify the level for encryption setting from Web Image Monitor of the PC.
- Log in to the machine as the Network Administrator from Web Image Monitor of the PC.
-
Click [Configuration] from the [Device Management] menu.
- Click [SSL/TLS] in "Security".
-
Specify the encryption strength in "SSL/TLS". It is recommended to not use RC4, DES which encryption strength levels are low.

- After completing the configuration, click [OK] and exit the Web browser.
(For more details, see the following link)
- Log in to the machine as the Network Administrator from Web Image Monitor of the PC.
-
Click [Configuration] from the [Device Management] menu.
-
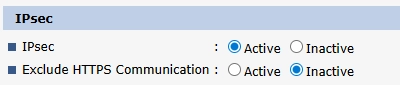
Click [IPsec] in "Security".
-
Activate IPsec.
-
*Select Inactive in Exclude HTTPS Communication so that even if the IPsec settings are incorrect, the settings can be changed via the Web. In such case, communication security can be maintained with SSL.
-
*When IPsec settings are wrong, you can specify the settings again by selecting Inactive to IPsec on the operation panel.
-
-
Click [Edit] in the Encryption Key Auto Exchange Settings.
Specify the settings according to your PC environment.
For details, see the following link: - After completing the configuration, click [OK].
Community setting
- Log in to the machine as the Network Administrator from Web Image Monitor of the PC.
-
Click [Configuration] from the [Device Management] menu.
-
Click [SNMP] in "Network".

-
Set each item in Community.
Security strengths can be improved by not sharing Community Names among large numbers of people, such as by separating Community Names for each business site.
-
Community Name: Specify any community name (within 15 single-byte characters).
It is recommended to change it from default name. - Access Type: Select access permission to communities
- Protocol Type, Active/Inactive: Specify protocol type to use for the community.
- Manager Address: Enter Host address according to the protocol to use.
-
Community Name: Specify any community name (within 15 single-byte characters).
- After completing the configuration, click [OK].
Encrypting Data Communicated with Machine Management Software via SNMPv3
- Log in to the machine as the Network Administrator from Web Image Monitor of the PC.
-
Click [Configuration] from the [Device Management] menu.
-
Click [SNMP] in "Network".
-
Select "Encryption Only" in [Permit SNMPv3 Communication] in [SNMPv3 Setting].
-
*To set encryption password, go to Device Management > Configuration > Device Settings > Program/Change Administrator
-
- After completing the configuration, click [OK].